Friday, June 14, 2019

Research Note #22 - Reading GCOM-C 250m-Res HDF5 Data with Fortran

There were not so many references about 'simple' ways to open and read HDF5 data file with Fortran as well as compiling the codes. I said 'simple', because there are actually manuals and tutorials about that purpose, however, most of them were too complicated and refer to other sub-references, thus blah .. blah ... it takes too much time, especially if you just simply want to open, read and compile a HDF dataset. Here, I posted a very basic way to access HDF5 data, using very minimal Fortran code. Before starting, here's the convention:
  • I used Linux OS. 
  • I used Fortran 90 for programming.
  • HDF5 (ver 1.8.17) libraries has been already installed in my system as module.
  • I used JAXA's GCOM-C NDVI Monthly statistics (Level-2 data) with 250m spatial resolution with Sinusoidal/EQA projection. This data contains 4800x4800 pixels. For exemplary purpose, I renamed it to "ndvi.h5".
So, the following is a very basic example of Fortran code to open and read HDF5 data:

PROGRAM HDF5test

   USE HDF5
   IMPLICIT NONE

   INTEGER :: hdferr, i, j
   INTEGER(HID_T) :: fileid, dset
   CHARACTER(LEN=7), PARAMETER :: filename = "ndvi.h5"
   CHARACTER(LEN=19), PARAMETER :: dataset = "Image_data/NDVI_AVE"
   INTEGER, PARAMETER :: xdim = 4800
   INTEGER, PARAMETER :: ydim = 4800
   INTEGER, DIMENSION(1:xdim, 1:ydim) :: ndvi_ave
   INTEGER(HSIZE_T), DIMENSION(1:2) :: dims = (/xdim, ydim/)
   
   CALL h5open_f(hdferr)
   CALL h5fopen_f(filename, H5F_ACC_RDONLY_F, fileid, hdferr)
   CALL h5dopen_f(fileid, dataset, dset, hdferr)
   CALL h5dread_f(dset, H5T_NATIVE_INTEGER, ndvi_ave, dims, hdferr)

    DO j = 1, ydim
      DO i = 1, xdim
         print *, ndvi_ave(i,j)
      ENDDO
   ENDDO

  CALL h5dclose_f(dset, hdferr)
  CALL h5fclose_f(fileid, hdferr)
  CALL h5close_f(hdferr)

END PROGRAM HDFtest

The most important lines are:
  • CALL h5open_f(hdferr)This function initializes HDF5 library for Fortran uses. Returns 0 (to hdferr variable) if it's successful, and -1 if it's failed.
  • CALL h5fopen_f(filename, H5F_ACC_RDONLY_F, fileid, hdferr). This function opens an existing HDF5 file. In this example, I just want to read it, hence H5F_ACC_RDONLY_F was used as argument. This function will return integers for file identifier and status to fileid and hdferr variables, respectively.
  • CALL h5dopen_f(fileid, dataset, dset, hdferr). This function opens an existing dataset in the opened file. Take notice that it needs file identifier (from h5fopen_f), dataset name, dataset identifier and status (as previous functions).
  • CALL h5dread_f(dset, H5T_NATIVE_INTEGER, ndvi_ave, dims, hdferr). This function reads raw data from dataset of the file, into a buffer. The buffer means a space in the computer memory, this could be a variable or array. Take notice that it need dataset identifier (from h5dopen_f), memory data type (Native integer), buffer, dimension (to store buffer dimension) and as always, status (hdferr).
To make it simple, the program will firstly initialize HDF5 library, opens an existing HDF5 datafile, opens a dataset from that file (a file could consist of many datasets), read the raw data from the dataset, put the data into an array buffer, then prints the contents of the buffer into the screen. Finally, it closes the dataset, closes the file and ultimately deactivates HDF5 library (flush and cleans the memory). That's all.

Another important thing is variable declaration. HID_T and HSIZE_T are parameters for predefined datatype used by HDF5 library. So, don't be confused with them (for details, just read: https://support.hdfgroup.org/HDF5/doc/fortran/index.html).

Finally, save and give the codes a name (for example: test.f90). To compile the code, just use this command on (bash) shell:

$ h5fc -o test.exe test.f90

It's just similar with a normal Fortran compiler command. If you don't specify a name for the output, a file named 'a.out' will be generated by the compiler.

Tuesday, June 11, 2019

Gunpla #50 - HGUC Gundam TR-1 [Hazel-Rah] Review


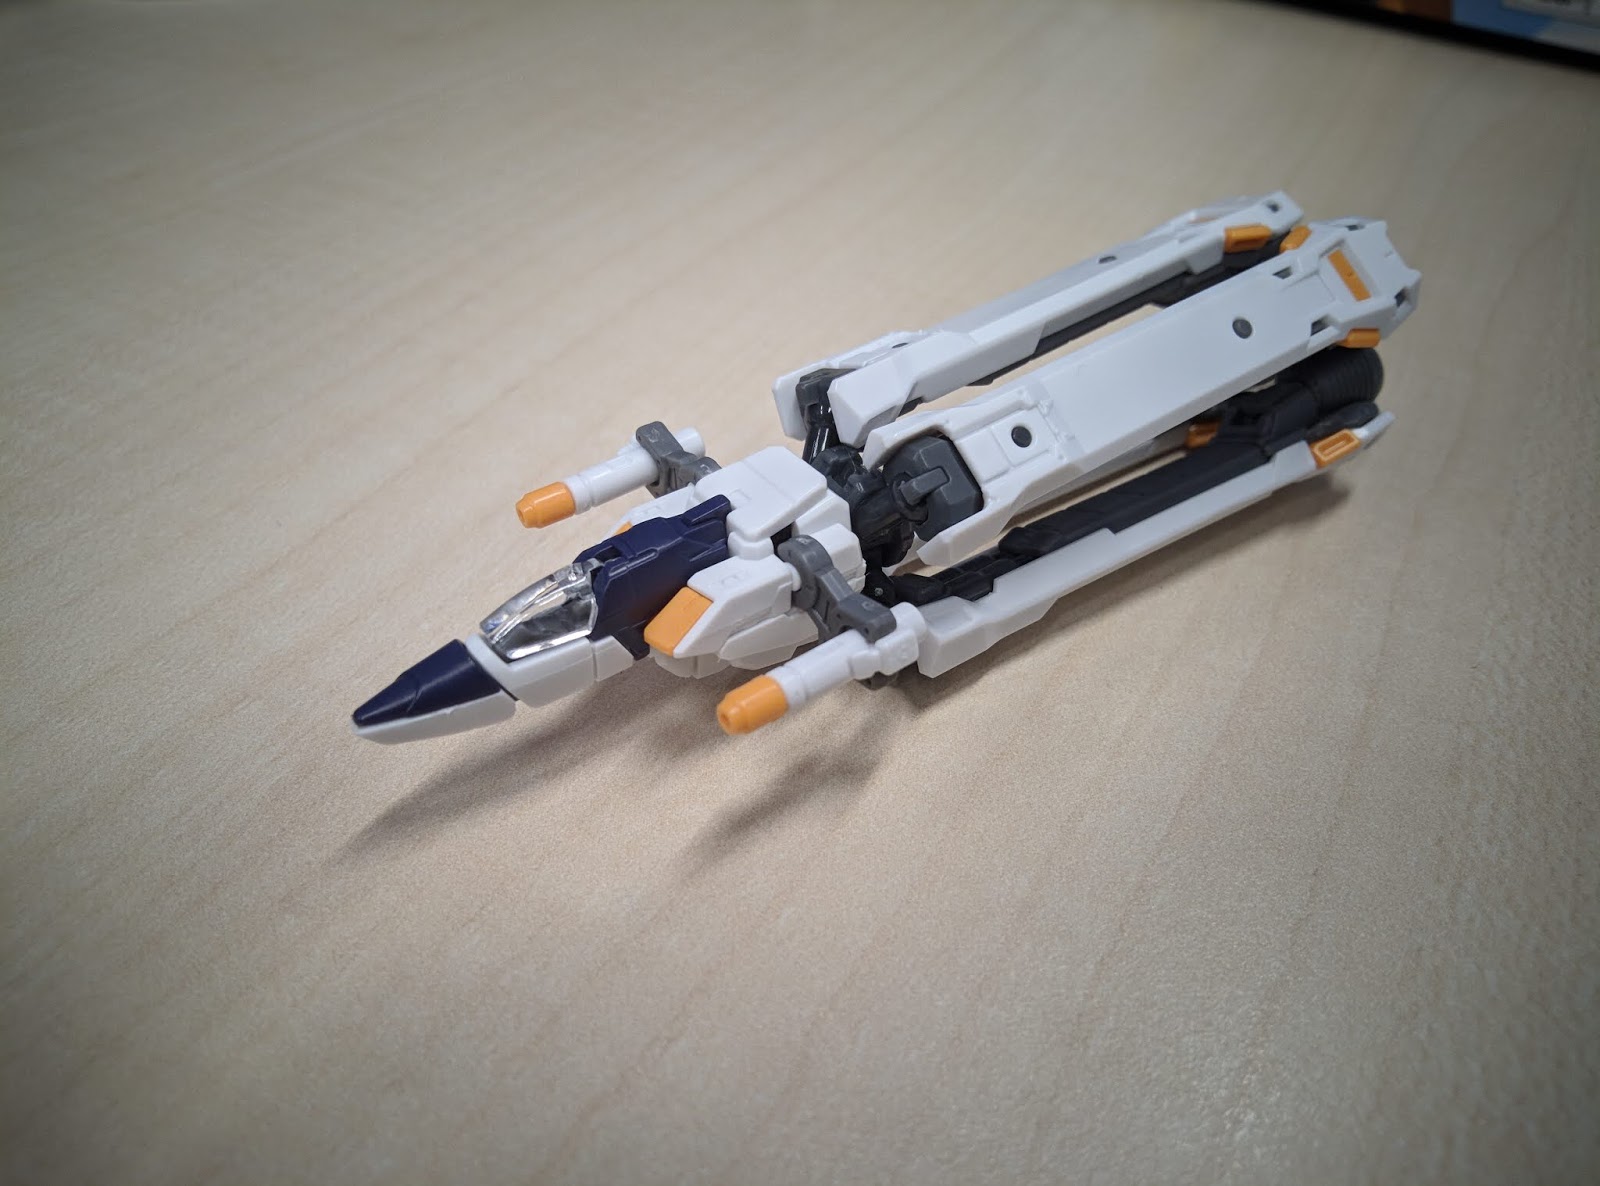
I was so busy with my study for the last one month, thus in order to save time, I decided to make a review of a combination of two HGUC kits instead of reviewing them individually (I will do it soon though). This time, the lucky kit is Gundam TR-1 [Hazel-Rah], or just call it Hazel-Rah. 

I'm pretty sure, many of you, in particular the AoZ fans, knew what it is. Hazel-Rah is actually not an official kit, but rather a combination between HGUC Gundam TR-1 Hazel Custom and HGUC Hrududu support fighter, which makes it officially an upgrade of HGUC Hazel-custom. These two kits were actually released by Bandai in the past: Hazel custom as retail released in 2005, followed by Hrududu as an add-on of Dengeki Hobby magazine in 2006. Since Bandai recently got license to AoZ designs, they started releasing many AoZ kits in the past one year. Hazel custom and Hrududu eventually received a re-make, and finally released as p-bandai last month. I won't talk much about each kit, but rather reviewing the end product of their combination.


So, Hazel-Rah is basically a Hazel custom equipped with Hrududu as its backpack, and got an extension for its beam rifle. It is quite similar with HG 00 Gundam combined with 0 Raiser (which was also reviewed in this blog). For making Hazel-Rah, you need a retail or p-bandai Hazel Custom and a p-bandai Hrududu. Yes, a retail OR p-bandai Hazel Custom. I said this because the manual actually states that it needs an unassembled p-bandai Hazel Custom while it actually could use a retail one as well, assembled or unassembled. Greedy Bandai!


If you have already constructed Hazel Custom, you could simply just remove the red cockpit piece from the kit and put the cockpit part of Hrududu on the chest section of Hazel Custom, then put the main body and wing section of Hrududu on Hazel Custom's backpack. Finally, just add the blade rifle sections to the Hazel Custom's beam rifle, and that's it.


While Hazel-Rah could actually stand on its own, I suggest you to use an action base because of the heavy backpack. Another issue is articulation. With such heavy add-ons, moving the body parts is becoming difficult, thus don't expect much for dynamic poses with this kit. If you have two Hrududu kits, you actually could make a second-form variant of Hazel-Rah. Furthermore, if you could kitbash it with Advanced Hazel's scope, subarms and feet to make Hazel-Rah Full Armor form. As a gimmick, the 'claw' on Hrududu's right wing could open, and you could put blade rifle or beam saber effect (I suppose) on it.


As verdict, Hazel-Rah is a great kit. If you have already had a Hrududu, you MUST combine it with Hazel Custom. While this giant lacks articulation because of its massive body, the presentation itself is really amazing. Just put it on your work desk, and you could feel really badass for whole day, believe me (lol). Finally, remember, aside from Hrududu (which is a p-bandai), you only need retail a Hazel custom to make it, not a p-bandai one. 

----------

RX-121-1+FF-X29A Gundam TR-1 [Hazel-Rah]

Pros:
  • Beautiful (and badass) aesthetics
Cons:
  • Limited articulation


Tuesday, May 28, 2019

Gunpla #49 - RG Crossbone Gundam X1 Review


Finally, Crossbone Gundam made its way to RG line! Bandai hailed this kit as the part of Gunpla Evolution Project for 'Extreme Details', and they certainly were not joking about it. This kit was officially released in Japan on May 25th 2019, even though some stores have actually put it on their shelves one or even two days before the release day. It was sold with 2700 Yen price tag and as you  may have known, we could get it with cheaper retail price in Japan. With real-life head height of 15.9 meters, this should be one of the smallest mobile suits in RG line.


The box looked like a typical RG boxes, with totally 10 runners inside. Similar with RG Tallgeese and Sazabi, Crossbone Gundam adapted limited (partial) advanced MS joint system, this time with only body and core fighter frames are pre-assembled on the B-runner. This partial inner-frame has proven successful to give the latest RG kits much more stability than previous released ones with full advanced MS joint.


The constructions started with core fighter, which I mentioned before, has an inner-frame for the "X" shape thrusters. If you have built RG GP01 in the past, you will quite familiar with some parts of core fighter. The next are feet, legs and waist section. The construction of the waist was pretty interesting,  because it has special gimmicks for the front skirts (scissor anchor). Furthermore, the crotch-legs joint was fixed into one position in contrary with movable (forward-backward) joint which was normally seen on previous RG kits.


Next, the body, which used the last inner-frame from B-runner. The construction was quite simple and specialized to host the core fighter. The arms unit of this kit were interesting because the upper wrists could be rotated 360 degree, probably to enable the arm guards (for beam shield) moved forward. The shoulders were built together as the parts of arms unit, and damn ... there were so many tiny parts on it.


The most difficult part to built of this kit was the head, mainly because everything was so damn tiny. I recommend you to prepare (at least) a tweezers to help the job, in particular for attaching the eye sticker to the clear plastic part. Initially, I only used my hand, and eventually messing up the eye. Fortunately, RG stickers have two eye options, thus I finally succeed on my second attempt, this time with the help of a tweezers. For the eye parts, you can choose for having normal two eyes, or one-eye with a patch. The mouth plate of this kit could be opened (which makes the gundam face look more scary lol). The scars on the each side of the head use stickers, but I decided to paint them later. Lastly, be careful with the skull emblem on the forehead, because it tends to fall off. Glue it if necessary. 

After completing the head, we can dock the core fighter into the mobile suit. The docking was easy and solid. Finally, you can start construct and attach the best accessory provided for this kit: the anti-beam cloak. Now, he looks so badass!!


This kit comes with a lot of accessories. For weapons you got beam sabers (2x), beam zanber, buster gun, chains for anchor scissors (2x), heat knives which could be attached on the feet soles (2x). For beam parts, aside from beam sabers, you get effect parts for brand makers, beam shields and beam zanber. Beam zanber hilt and buster gun could be combined to make Zanbuster. A part for rifle grenade (attached on the tip of Zanbuster) is also available. There are 4 pairs of hands: static clenched, weapon holding hands 1 and 2, and finally, opened hands. Finally, the last but not the least, the anti-beam coating cloak.   


Size comparison with RG Sazabi, Banshee and Tallgeese II
Basically, there were not many parts to panel line on this kit, except the core fighter. For panel lining, I used gundam marker pen black (GM01) and grey (GM02). For the red scars, I used red paint gundam marker (GM07). Applying RG stickers on this kit was probably the most boring and hideous part of the build, and yes, the Crossbone Vanguard emblem on the chest is sticker, unfortunately. Due to curvy surface of the chest, there will be warps which are ugly to see. Hence, I trimmed the sticker as much as I could to minimize the warps on it. Damn it Bandai, I don't mind to pay more for the waterslide than these stickers.        

Once it finished, let's make some cool poses!


The articulation of this kit was pretty good and the parts were solid for posing. The only parts which tends to fall off while posing were knee caps, but I think it's not a big issue because they move a lot. The four 'sheet' of cloak also articulated, you can make them swing to the left or right for the 'wind' impression. The thrusters also articulated really well, no problem whatsoever. Since the neck was fixed into the frame, there's no chicken-head articulation as normally seen on previous RG. Anyway, head-up and down articulation was still there. Overall, despite some missing features of previous RGs, this kit has great articulation.


Finally, the verdict. RG Crossbone Gundam X1, as the previous RGs, is a great kit and I really recommend it for everyone who loves gunpla. It's amazing Bandai still could manage to provide 'extreme level' of details into such tiny kit. It is solid, greatly articulated, and with a lot of accessories, options and gimmicks, 2700 Yen price tag looks nothing. The only issues I had were the stickers and its tiny parts. I say it again, make sure to prepare a tweezers before building this kit.   

-----------------

XM-X1 Crossbone Gundam X-1

Pros:
  • Extreme detail and lots of gimmicks
  • Solid build and great articulation
  • Tons of cool accessories

Cons:
  • Super tiny parts, use of a tweezers is strongly recommended
  • Suck stickers, especially the Crossbone Vanguard insignia