Wednesday, March 1, 2017

Gaijin Story #7 - Paying Electricity, Gas and Water Bill in Japan at Convenient Store


When I came and started living in Japan for the first time, one of my biggest worries is about how to do money transactions for daily living. As a foreigner, I imagined many troublesome things due to the language barrier. After living for almost one year though, I've finally realized that Japan has one of the most sophisticated online transaction systems in the world, which means, you have so many options for money transactions. You could pay almost everything by credit card, debit card, bank transfer, net bank and convenient store. And for this post, I would like to specifically share my experience for paying utilities bill at konbini (Japan pronunciation for convenient store), which is in my opinion, the most "friendly" option for foreigner.

Utilities such as electricity, gas and water are the most mandatory for houses in Japan. They are also interconnected with each other for specific purposes, for example, water heater is a must during winter and it needs water (of course), gas (for heating) and electricity (for power). So, you practically won't survive without all of them. Therefore, it's very important to pay the bills in time to avoid trouble with the utilities companies (they can stop the service if you're late).

For my case (3 members family), I usually pay around 3000-6000 Yen/month for electricity. The most expensive periods are usually in summer and winter, due to the extensive use of air conditioner and heater. For gas, I usually pay around 2000-6000 Yen/month. The most expensive period for gas is in winter, due to water heater (nobody wants to take a bath with freezing water). Finally, the water usually costs me 5000-7000 Yen/2 months, which means around 2500-3500 Yen/month. Water costs usually not fluctuated much as electricity and gas.

Electricity bill
Gas notice (Left) and Water bill (Right)
Gas bill
I live in Kashiwa and as other cities, the electricity and gas bills come to the mailbox once a month, while water bill comes once every two months. Sometimes, the company will send notice before the real bill comes. The notice may look similar with bill, but its purpose is just to inform you the upcoming amount of payment and you could not use it to pay utilities. Meanwhile, the "real" bills will have a specific bar code which could be use for utilities payment. So far, I have paid electricity bills at 7/11 and Familymart, but I suppose any konbinis (Sunkus, Lawson etc) will do so.

Konbini cashier display. Ask the cashier staff about utility payment, give the bills and push the button in the center to confirm bill payment.
Bill receipts. From left to right: water, gas and electricity.
For paying bills, just give the them to the cashier counter and they usually understand even if you don't talk about it. The cashier will ask you to press a specific button on the cashier machine for payment confirmation. After you pay, they will give you give one part of the bills as receipts with specific date and place stamp of the payment. That's all, very easy and convenient.  

Saturday, January 21, 2017

Gunpla #32 - HGUC GM Ground Type Review


Finally got this guy on its release day (which is really a good thing if you stay in Japan). While the normal price on the box shows 1500 Yen, the kit was sold with much cheaper price at retail shops such as Yodobashi Camera or Biccamera. I only paid around 1200 Yen this time.

What a cool box art
Similar with the previous 08MS Team's kits, the box art was gorgeous, showing three GMs in the battle field, holding different machine gun, bazooka and net gun while Zakus flying in the background. The box also shows description, history and features of the kit in Japanese and ENGLISH. Nice!


Now let's do the unboxing. The box contains 8 runners in total, with 6 PS runners (they're rather soft plastics), 1 clear runner for beam saber and 1 polycaps runner. The others are a manual, foil sticker, transparent sticker (numbers only) and an enquete paper? I barely read Kanji, but I suppose the runners are completely new, not reused from previous kits.


Unfortunately, the net gun, which was shown with light grey color on the boxart and previous release images in fact, only has the the same color with bazooka, which is dark grey.

The building itself was simple and straightforward. There are lots of panel lines, so I suggest it's better to do panel lining for each part from the beginning. One of the most interesting things about this kit is the ball joint on the chest armor which provides articulation for the torso to move back and forth, as well as for side-to-side movement, which is quite similar with HG Gundam Revive. Another cool gimmick is the beam saber rack which is stored at the calves of the legs instead of on the backpack as typical feddies mobile suits.

The orange colors look nice with the blending of brownish white. Unfortunately, the white part of chest vents are stickers, but I suppose painting them is not so difficult. There are also tiny stickers for the chest, legs and calves which store the beam sabers. The backpack is assembled by two parts and unfortunately, there are no holes for custom parts (why Bandai, why ??).


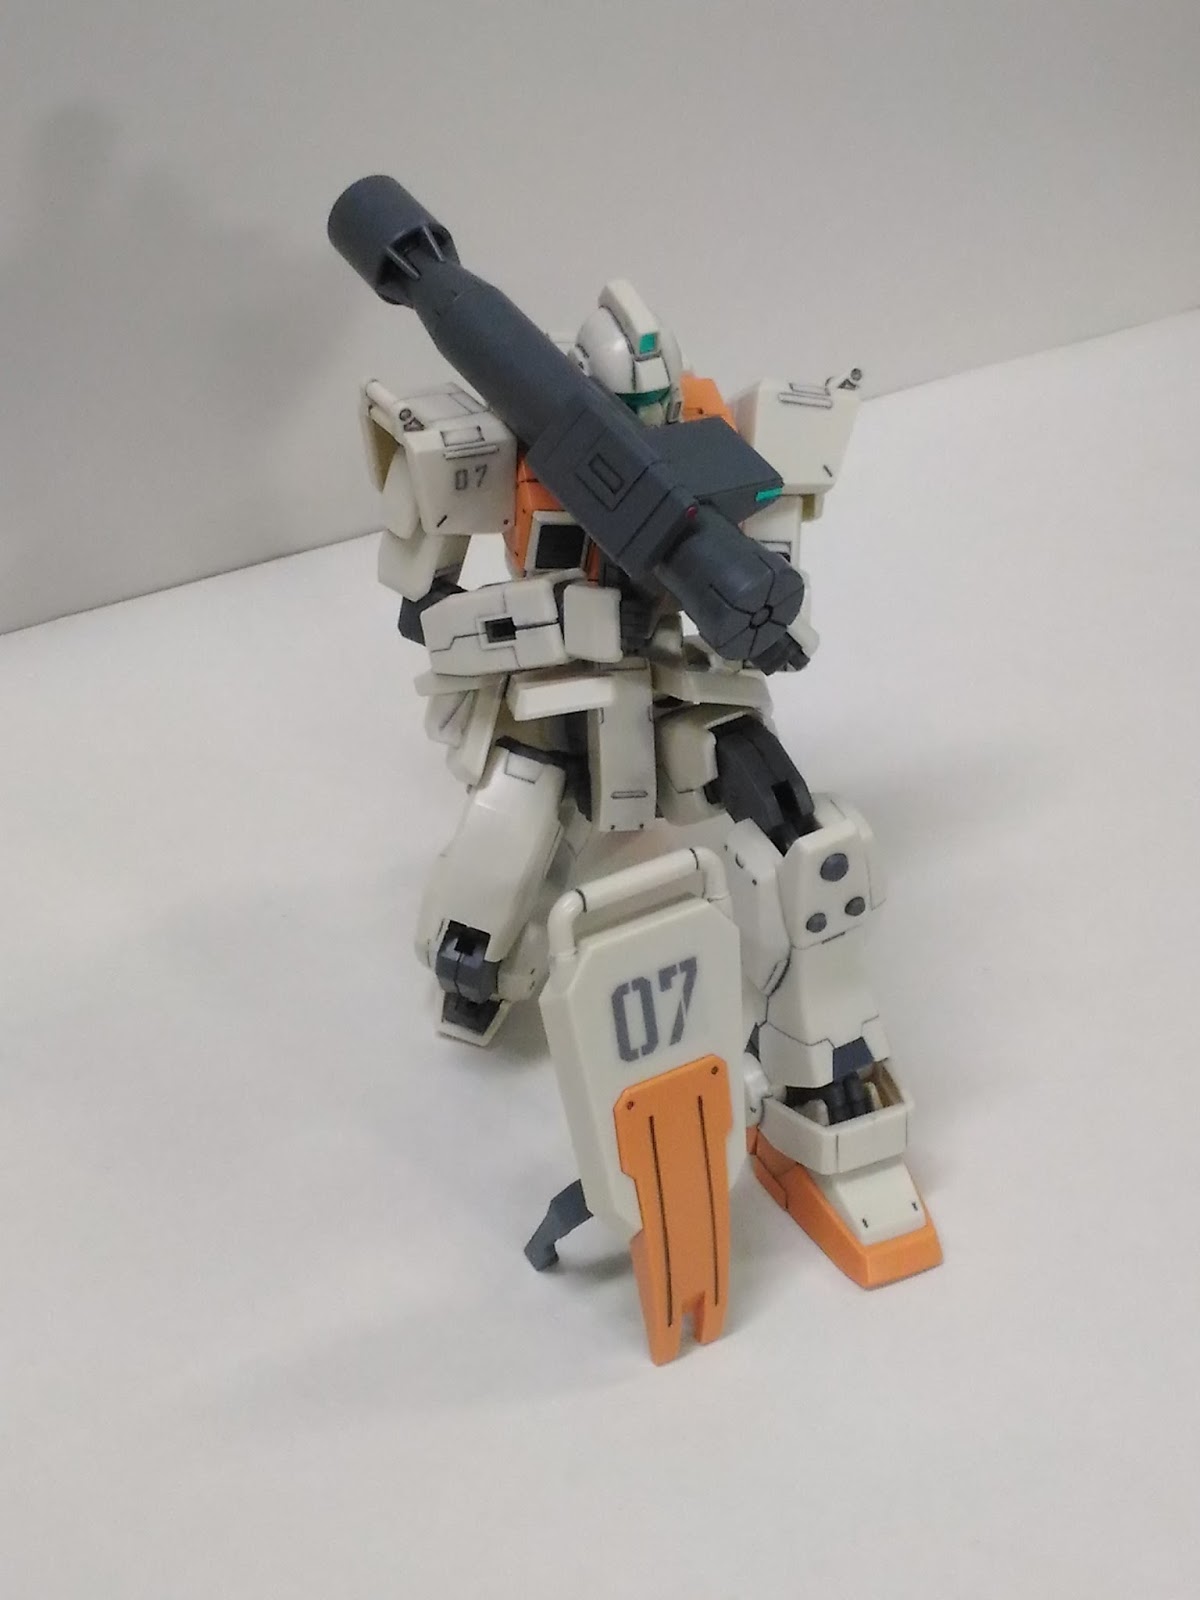
The finished body looks really great. as well as the accessories which come with this kit. You'll get a machine gun, bazooka, net gun, two beam sabers, and an open left hand. There are no trigger hands needed because the weapons could just slide into the standard close hands, which means the GM could freely grab the weapons on the right or left hand. There's also nice part separation on the machine gun. Pretty cool and quite much for a HG kit with price less than 1.5k Yen.


 Anyway, how about the articulation?? It's amazing!! Just look at these pictures.


The joints are rock solid with wide range of movements. No wonder it could make many cool poses. In term of articulation, this guy probably in par with the Gundam Revive. It's really fun playing with it.

Some extra pictures.


So here's the verdict. This kit probably is the best GM ever released in 1/144 scale. It just excels in many aspects: great details, bunch of accessories, amazing articulation and cheap price. I couldn't say anything more. I truly recommend this kit, especially for the GM or HGUC fans.

---------------------

RGM-79[G] GM Ground Type

Pros:
  • Great details with many panel lines and nice color scheme.
  • Amazing articulation. Probably one of the best in HG line.
  • Bunch of accessories for a relatively cheap kit.
Cons:
  • Some parts still use sticker for color separation, especially the chest vents.
  • No color separation for the net gun.
  • No custom connectors on the backpack (for custom builder parts).   


Friday, January 20, 2017

Gunpla #31 - HGUC Zeta Plus A1 (Unicorn version) Review


I was thinking, while building HGUC Zeta Plus C1 (C1) last month, that it would be probably great to have its brother unit, the A1, posing together with it. That's why I decided to build the A1. 

Well, since ZPA1 is actually the normal release kit and it's basically the same unit with ZPC1, Nevertheless, It probably looks funny to review a limited kit before the normal release kit, thus I didn't expect anything special from it. Anyway, I finally realized more differences other than I mentioned on previous post about the ZPC1. I noticed the blue on the sides of the head and feet is darker than ZPC1. Other than that, the eyes and sensors on the head and shield have red color instead of blue of course. The weapon of ZPA1 is also a standard ReZEL beam rifle which is almost similar with HGUC Delta Plus, except for a special peg at the end of the rifle. I suppose, the main purpose of the peg is to connect the beam rifle on the top of waverider mode, as mentioned by many reviews out there. 

But tell the truth, compared to C1, the A1 looks much more menacing with those red eyes ... 


I don't have much time to write the review this time, but I notice that A1 has less articulation compared to the C1 due to its beam cannon design. While A1's beam cannons look cooler than C1, the front armor of the beam cannons greatly limiting the leg movement of the kit. If we move the legs forward, they will bring the beam cannon forward as well. Of course, there's trick to avoid it, but I still think its troublesome.

The A1 also comes with less transparent stickers, with only ZPlus and EFF marking available, compared to the C1, and unfortunately, there are no unit number markings which are usually provided for HGUC mass production kits. Therefore, I put the spared unit number sticker from C1 for this kit. On the other hand, accessories for this kit is basically the same with C1, with only trigger right hand for the extra hand and a pair of beam sabers.

Due to my preparation study for the exam, I haven't tried to transform this kit into waverider mode, hence I can't say anything about it now. But I think it should be awesome as C1 and Delta Plus. For now, I just put the three on my desk, in their mobile suit mode. Standing together, they look totally awesome!

Zeta Plus A1 (right) with Zeta Plus C1 (left)

With A1 and Delta Plus
I will make more detail review with more pictures soon. Anyway, I could say that, similar to ZPC1, this kit is pretty expensive for a HG. If you check the price, it's just 600 yen less then MG ZPA1. Of course, the HG version provides more stability since it's a partsformer. In the end, it will depend on you whether to buy this kit or not. If you like a smaller-solid-partsformer Zeta Plus kit than bigger-transformable one, than this kit is for you.  

---------

MSZ-006A1 Zeta Plus A1 (Unicorn version)

Pros:
  • Amazing design, nice detail and cool color schemes
  • Solid kit with pretty good articulation
Cons:
  • Less marking sticker than ZPC1. No number marking.
  • Expensive HG compared to MG of the same kit.