Tuesday, January 28, 2020

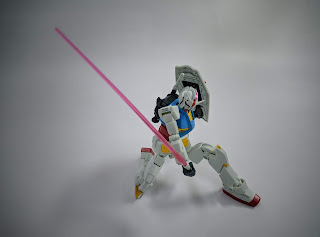
Gunpla #59 - HG Gundam G40 - Industrial Design Ver. Review


OK, this one was truly different from any other kits I've ever built since I started the hobby 7 years ago. The G40 was unique in every way possible: the name, the package, the assembly, the aesthetics, the articulation, the price tag, everything. From the first glance, it's obvious that this is the iconic RX-78-2 Gundam from UC timeline, and yet, the package didn't show any model number nor timeline like a HG normally does (e.g. HGUC), and no box art, just a black box with an big embossed silver 'G40' letters printed on it. Furthermore, the price tag of 3300 yen made everybody scratched their head. Just why did a HG kit become so ridiculously expensive? Interestingly, while it should be released as a regular retail kit, but for some reason, it was sold in very limited number at stores. It looked like Bandai didn't have much confidence to sell it as a regular retail kit.


Since the first time it was announced, G40 has drawn controversy among gunpla fans across the globe. Some people praises the brand new design and articulation, while the others despised its aesthetics and price tag. Tell the truth, I was among the people who hated it in the beginning. Anyway, after learning more details and building the kit, my respect gradually became stronger towards it. 


Many gunpla fans considered the design of G40 as 'ugly', especially with the curved aesthetics instead of blocky one as conventional RX mobile suit series. Anyway, the most controversial part of this kit was definitely the joints, particularly the hip joints. Due to fixed skirts of the kit, it utilized very unusual 'dropped' hip joints, which made G40 look so weird. The kit looked as it had a broken thigh. Anyway, there were big reasons behind this design. As I dug deeper into its design, I finally grasped the true concept of the design: G40 was the form of Gundam in case it's produced in real life. Surely, it betrayed the real-robot genre images many people cherish, but that 'broken thighs' are very reasonable in many real-life robot designs.


On the other hand, if there's aspects this kit excels at, then it should be the articulation. Never in my life, I've ever seen a kit so articulated as G40. It just could do any poses, from a cool poses to a absurd and ridiculous one. And while the price tag seemed so much expensive for a HG kit, the special artbook which came with it was truly worth it. 

You may love it or even hate it, but with the features came with the kit IMHO, G40 was one of the best HG of 2019.

------------------------

HG Gundam G40 Industrial Design Ver.

Pros:
  • The most insane articulation of gunpla you've ever seen.
  • The artbook was really nice bonus (I recommend you to read it before building the kit)
Cons:
  • Hip joints look really weird
  • Pretty expensive for a HG kit

Monday, January 27, 2020

Gunpla #58 - P-Bandai HGUC Gundam TR-6 Haze'n-thley II Review


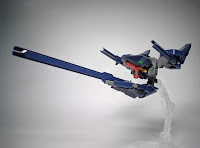
Since I have made a review for this kit on Youtube, I will just summarize some important things and post some nice pictures of it in this post. I understood that AoZ aesthetics and designs may not be for everyone, but IMHO, this kit was one of the best HG kits of 2019. Firstly, it's huge, and it's even taller than HGUC Fenelope, the biggest HG kit of last year. Second, it has interesting features and gimmicks, in particular with the transformation. Since it has two modes of transformation, you basically got three kits in one package: MS mode, top/bottom fighter mode and MA mode. Finally, similar with previously released AoZ kits in HG line, the Hazen'thley II is fully customizable, which means the kit could be easily kitbashed with the others from the same line. You got all these features with price tag less than 5000 Yen (original price), which is a good deal for such gigantic HG kit IMHO. There were of course downside of it, such as the lack of articulation on the torso and legs, complicated transformation, and mediocre marking stickers.

Mobile Suit Mode:

Rifle Mode


Crow Mode
Top Fighter and Bottom Fighter Mode


Mobile Armor Mode


Mobile Suit Mode with Hrududu II + Gundam TR-6 Hazel II ("Pseudo" Haze'n-thley II Rah)


Configuration with two Hrududu IIs

Mobile Armor Mode with Hrududu II + Gundam TR-6 Hazel II


Size Comparison

vs HGUC Second V (left) and MG RX-78-02 Gundam the Origin (right)

vs HGUC Delta Plus, Zeta Plus A1 and Zeta Plus C1


-----------------

RX-124 Gundam TR-6 Haze'n-thley II

Pros:
  • Wicked design, arguably the best of AoZ series by far
  • Two modes of transformation
  • Good price tag
  • Highly customizable for kitbash
Cons:
  • Complicated transformation with lots of part-forming stuffs
  • Lack articulation of the torso and legs
  • Mediocre marking stickers

Tuesday, January 7, 2020

Research Note #26 - Filtering Data and Making Standard Deviation using Google Earth Engine

So, there are two main objectives of this script: display data based on a certain threshold value (in this case, reflectance < 1000) and make a standard deviation from the results. The Data used in this example was Sentinel-2 MSI Level 2A, in the period between November 1 - 15, 2019. Cloud masking was utilized at the beginning of the script to choose granules which were clear from clouds.

// Create a geometry representing the analysis region.
var daerah = ee.Geometry.Rectangle([72.611536, 28.354144, 78.807625, 32.630466]); 

/**
 * Function to mask clouds using the Sentinel-2 QA band
 * @param {ee.Image} image Sentinel-2 image
 * @return {ee.Image} cloud masked Sentinel-2 image
 */
function maskS2clouds(image) {
  var qa = image.select('QA60');

  // Bits 10 and 11 are clouds and cirrus, respectively.
  var cloudBitMask = 1 << 10;
  var cirrusBitMask = 1 << 11;

  // Both flags should be set to zero, indicating clear conditions.
  var mask = qa.bitwiseAnd(cloudBitMask).eq(0)
      .and(qa.bitwiseAnd(cirrusBitMask).eq(0)

 // Choose pixels with reflectance < 1000
      .and(image.lt(1000))
      );

  return image.updateMask(mask).divide(10000);
}

// Map the function over the analysis region and period
// Load Sentinel-2 TOA reflectance data.
var datasentinel = ee.ImageCollection('COPERNICUS/S2')
                  .filterDate('2019-11-01', '2019-11-15')
                  .filterBounds(daerah)
                  // Pre-filter to get less cloudy granules.
                  .filter(ee.Filter.lt('CLOUDY_PIXEL_PERCENTAGE', 20))
                  .map(maskS2clouds)
                  ;

// Get the standard Deviation.
var hasil = datasentinel.reduce(ee.Reducer.stdDev());

// Define the plot parameter, use the standard deviation of Band 4 only  
var stdevVis = {
  min: 0,
  max: 0.005,
  bands: ['B4_stdDev'],
  palette: ['0000FF', '00FFFF', '00FF00', 'FFFF00', 'FF0000']
};

// Add the plot layer on the map
Map.addLayer(hasil, stdevVis, 'Std Deviation');
Map.setCenter(75.7095805, 30.492305, 14);

And the result will be like this:


You may seen some pixels with very high standard deviation values (shown in red, cyan or anything else other than blue). To 'clean-up' these pixels, we can add another filter to the standard deviation results. For example to show the values no higher than 0.000001:

// Get the standard Deviation.
var hasil = datasentinel.reduce(ee.Reducer.stdDev());
var hi_stddev = hasil.lt(0.000001);
var hasil = hasil.updateMask(hi_stddev);

The result will be like this:


Finally, we can overlay the base Google Map using the result by choosing the Satellite map (button on the right corner of the map).